
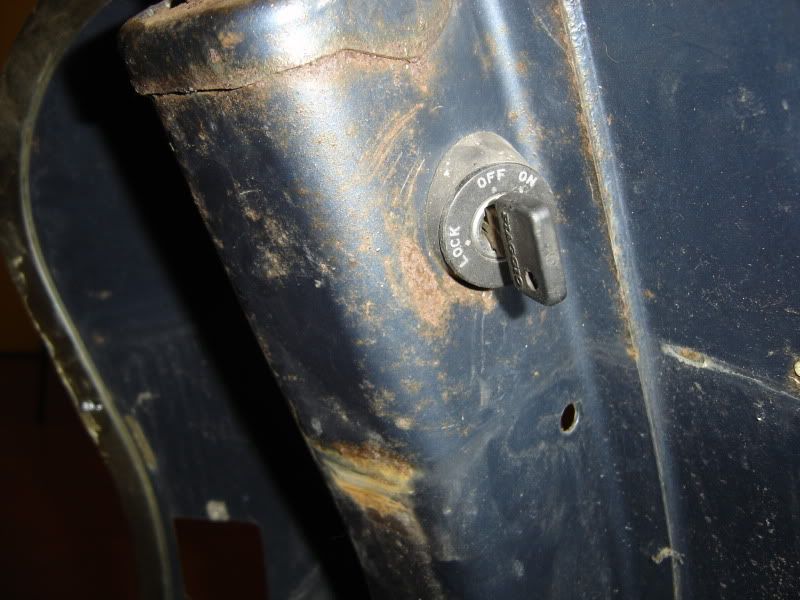
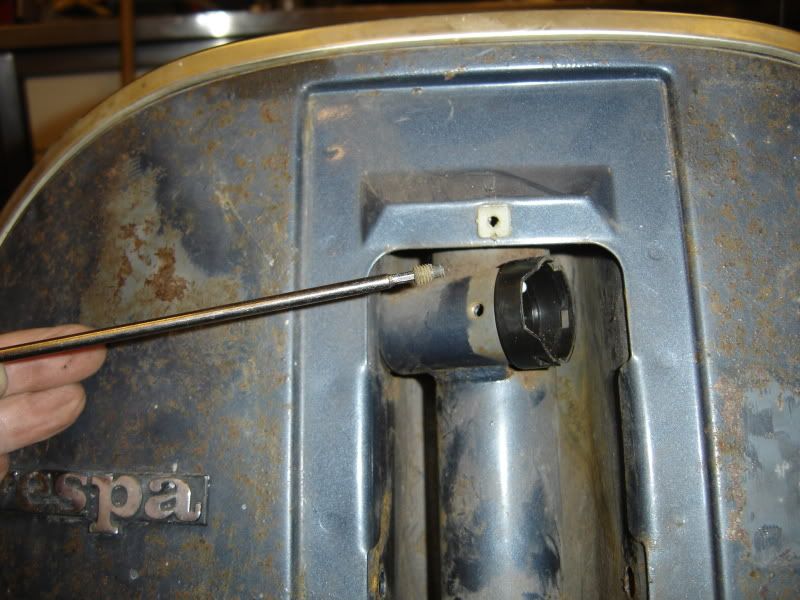
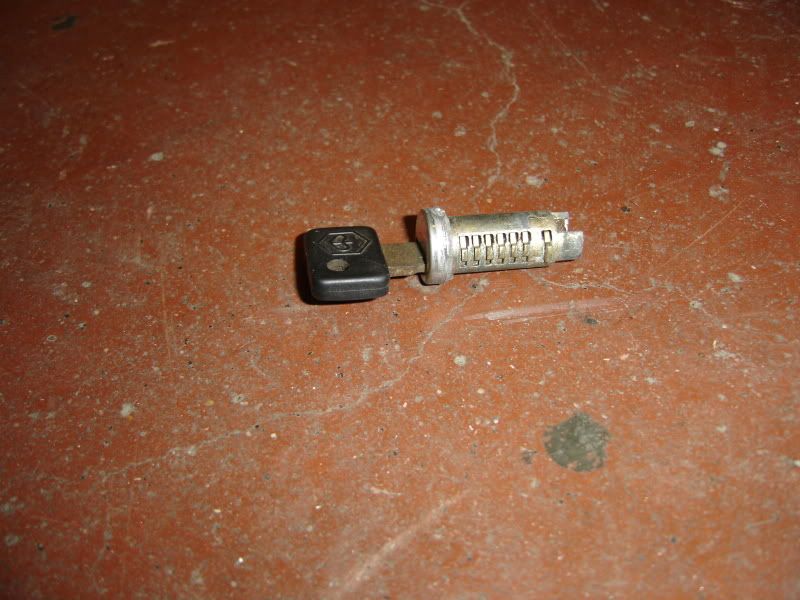
The further dismantling of the chassis brings me to the next tip: the ignition switch. For some a tricky thing to disassemble. That's why I would like to show you in a few steps with some pictures how simple it is to remove the switch.
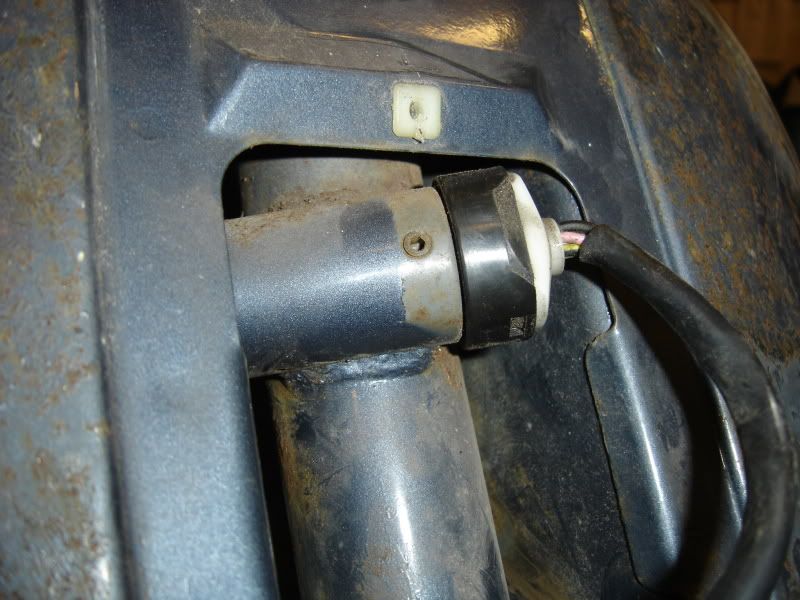
At the back we click off the electrical piece of the ignition. We do this with a small flat screwdriver and push through the notches in the area and thus release the button.
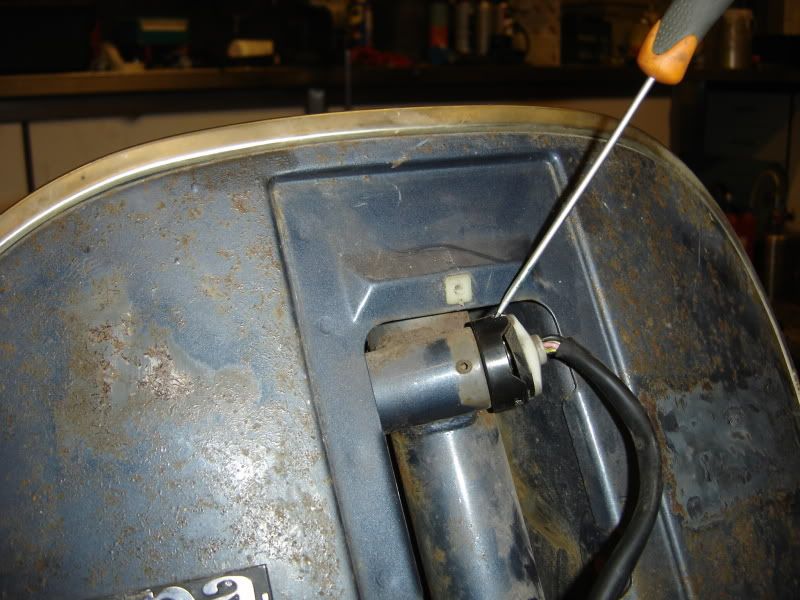
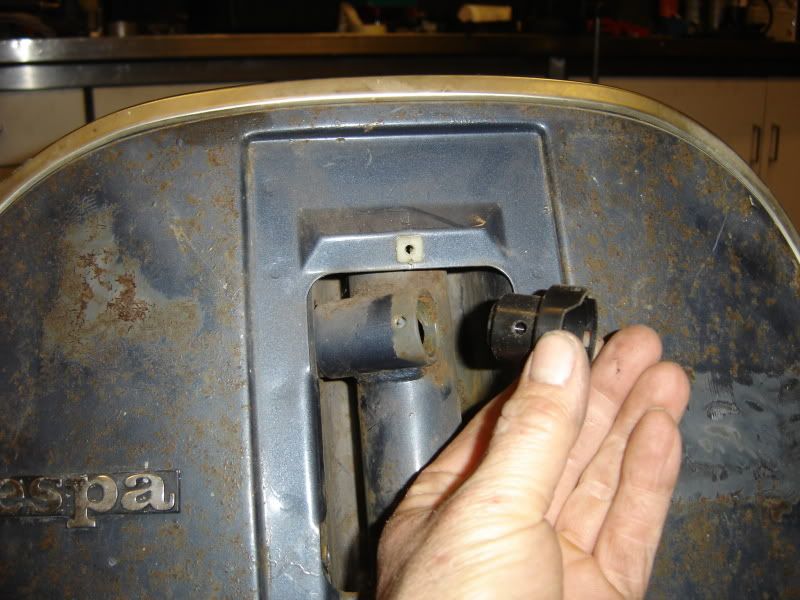
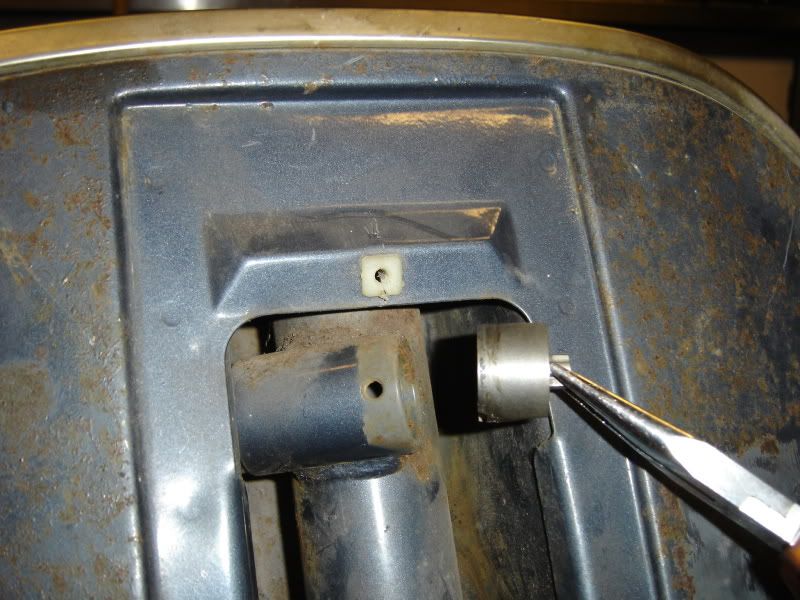
Nu kan je dit gedeelte met bedrading en al verwijderen. Hierna komt nog een gedeelte die we door middel van een imbus vijsje op de zijkant van het contact los draaien om zo ook te kunnen verwijderen.
Now you can remove the part with all the wiring. Next comes a section that we remove by unscrewing an allen screw on the side .
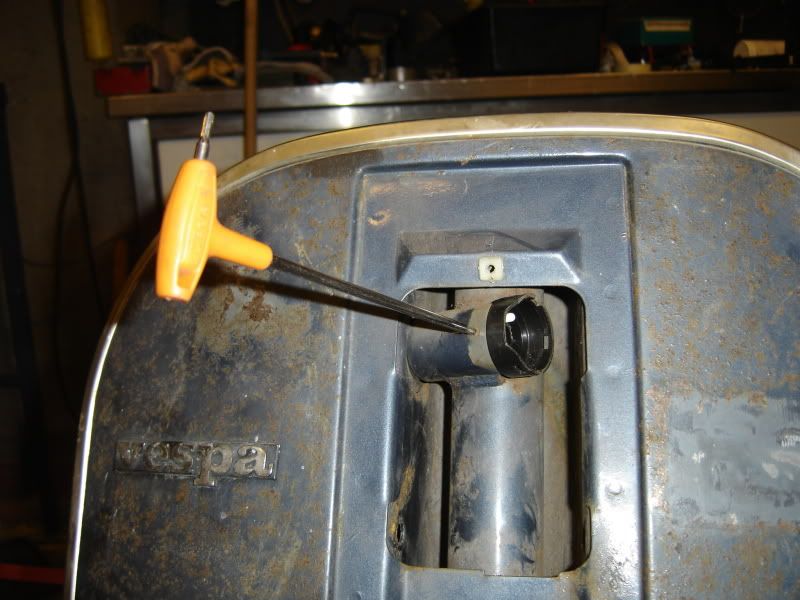
Na deze handeling komt het plastiek gedeelte los om te verwijderen.
After this operation you can remove the plastic part.
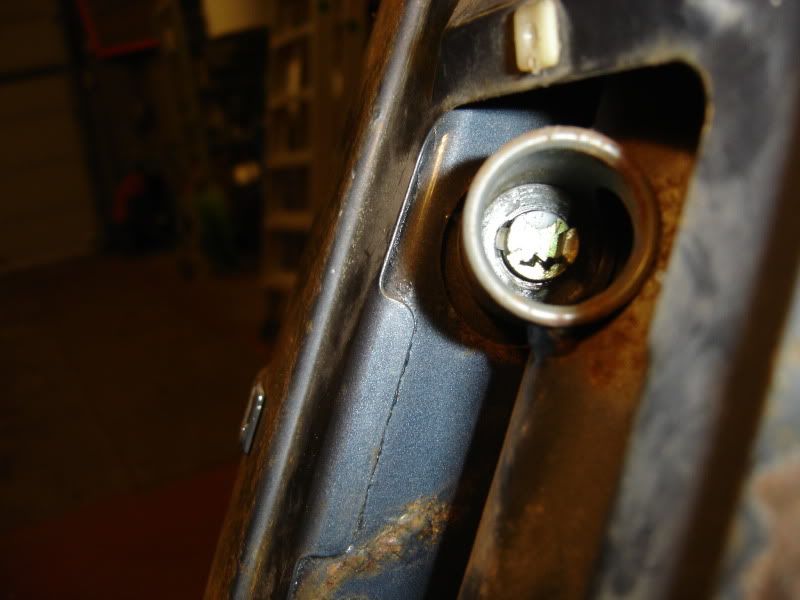
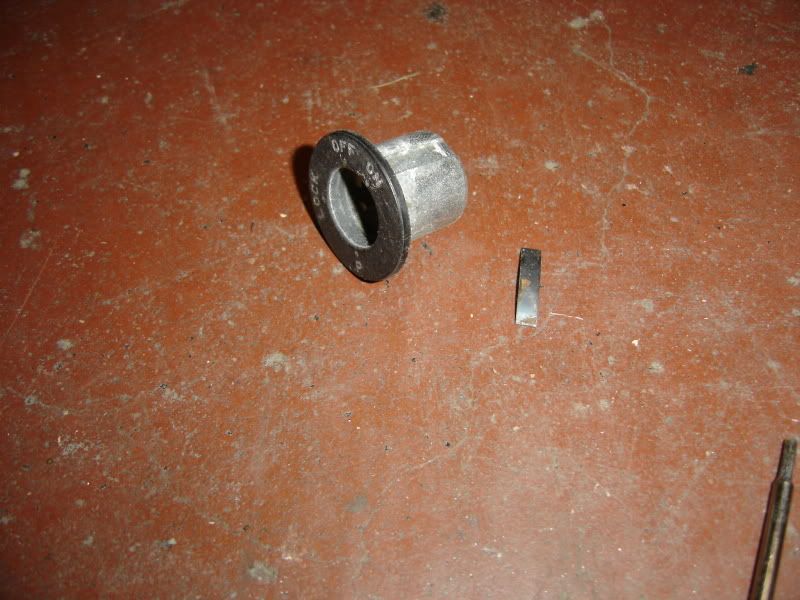
Het volgende is nog een metalen stuk die gewoon los zit en zo uitgehaald kan worden met een puntbek tang.
The following is a piece of metal that is loose and can be removed with a forceps.
Het volgende gedeelte is waarschijnlijk een struikelblokje om er uit te krijgen. het detail om dit er uit tekrijgen ligt hem aan het lipje die je moet induwen. Hier onder op de foto zie je aan de linker kant van het centerstuk een lipje zitten. Die duw je naar het midden toe en trek je ondertussen het sleutel-cilinderslot uit zijn zitting.
The next part is probably a stumbling block to get out. The detail on how to get this out is the tab that you have to push in. The picture below you see on the left side of the center piece a white tab. Push that towards the center and pull in the meantime the key cylinder from its housing.
Wanneer je dit juist heb zou je dit moeten over hebben.
If you did this correct, you will have this left over.
en dit...
and this...
Het laatste stuk moet je voorzichtig met een fijne schroevendraaier er uit schuiven. Let op de stalen "bladveertje" die de hele zaak op zijn plaats moet houden.
Ik hoop met deze je toch heel wat prutswerk bespaard te hebben.
The last part you should carefully slide out with a fine screwdriver. Note the steel "leaf spring" that keeps the whole thing in place.
I hope to have saved you a lot of misery with this…
Bedankt,ik heb hier veel aan gehad.
BeantwoordenVerwijderenIk heb n vespa pk 50 elestart en daar zit geen contactsleutel bij,nu kan ik proberen of hij loopt,hij staat al sinds 1992 stil dus ....ik ben benieuwd!